In order to let everyone know what I am talking about, first give the product link.
The first time we paid attention to the monitor rack was the addition of a desktop USB amplifier and its associated speakers. The two things added up to take up a lot of space on my 10060cm IKEA simple table, and the 27-inch display could barely fit. At that time, in order to make room under the display to the power amplifier, once considered changing the rack. Later, after adjustment, the space problem was solved and the pylons plan was shelved.
Recently, at home, a new house was renovated, and it was necessary to buy a few TV racks. Just to see the 99 specials, it was decided to buy it. Nothing had happened during the weekend, finishing the desktop mounting rack. So this small article.
processSimply and rudely, from the conclusion, the hanger is just an illusion that looks beautiful. The actual experience is not as good as the original base. Of course, all conclusions should have preconditions, and individuals think that my actual situation should be more typical and universal.
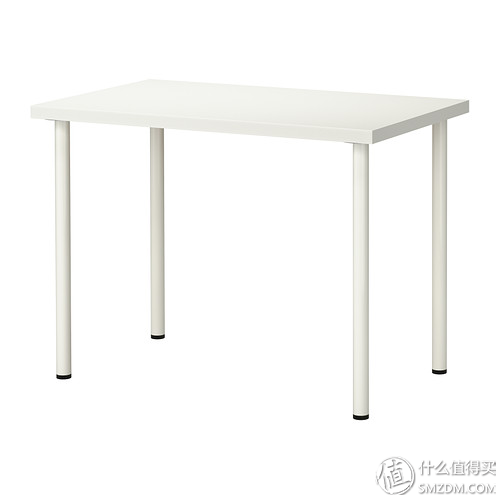
First, rack mounts are available in two ways: edge clips and desktop hole clips. The difference is the shape combination of the fixture. So if your desk is embedded in a combination furniture, then you cannot use the rack. (Unless you are willing to open a big hole on the desktop.) The following picture is the current IKEA assembly table official photos and actual desktop conditions. The advantage of this table is that the structure is simple and inexpensive, there are no extra drawers or cabinets under the feet, and the space is highly free.
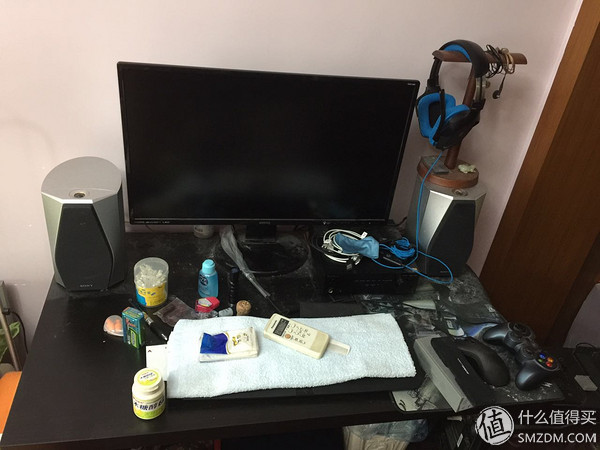
The table was against the wall, leaving a line to sewn through the various lines, and there were no immovable obstacles on the left and right sides. It is a very extensive layout. Although I was type A blood, I was too lazy to engage in various kinds of alignment. Since we can use 20% strength to achieve 80% effect, why spend 80% of effort for the remaining 20%. . . The initial idea was to use the hanger to hover the screen and vacate the space below the screen, remove the headset from the right speaker, and move the two handles currently occupying the mouse pad down. It also leaves room for new equipment to be added later.
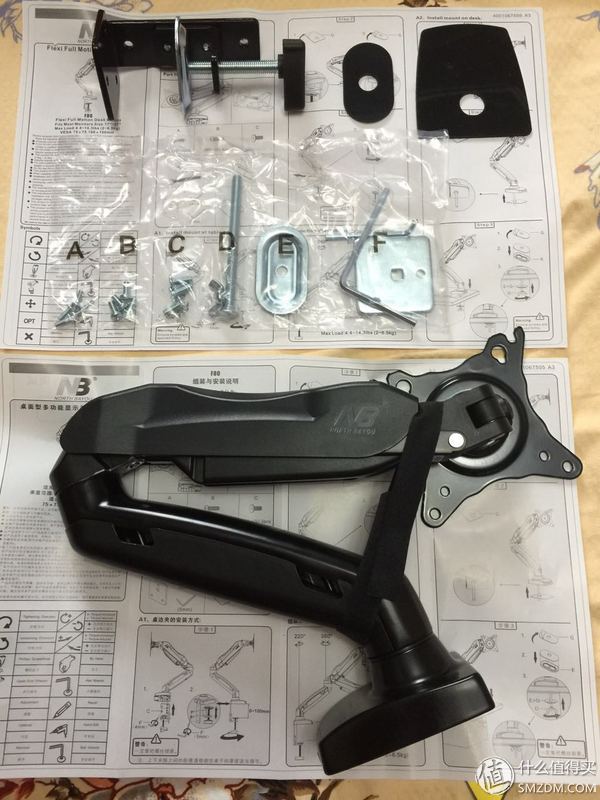
The family portrait of the product is accompanied by two installation instructions in both Chinese and English. The one-piece sub-packing bags are also all marked with letters and correspond to the instructions on the instruction manual. The details are very good.

Then the question came.
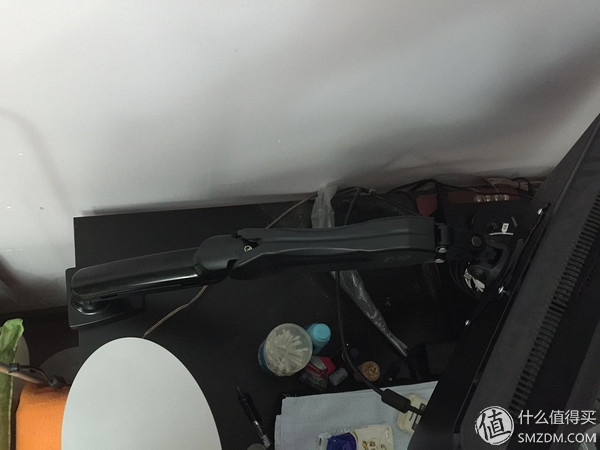
The first time it was installed on the left side of the table, in order to avoid the installation area of ​​the table leg, the actual installation position is 4/5 of the depth of the table.
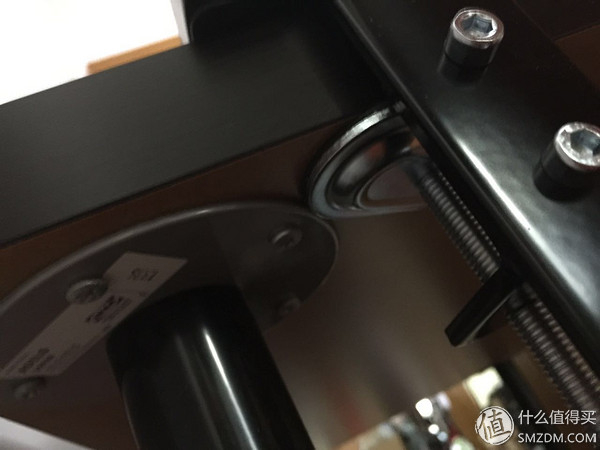
The problem came up: In the first quarter, the angle between the cantilever and the base was fixed, occupying the position of the original speaker.
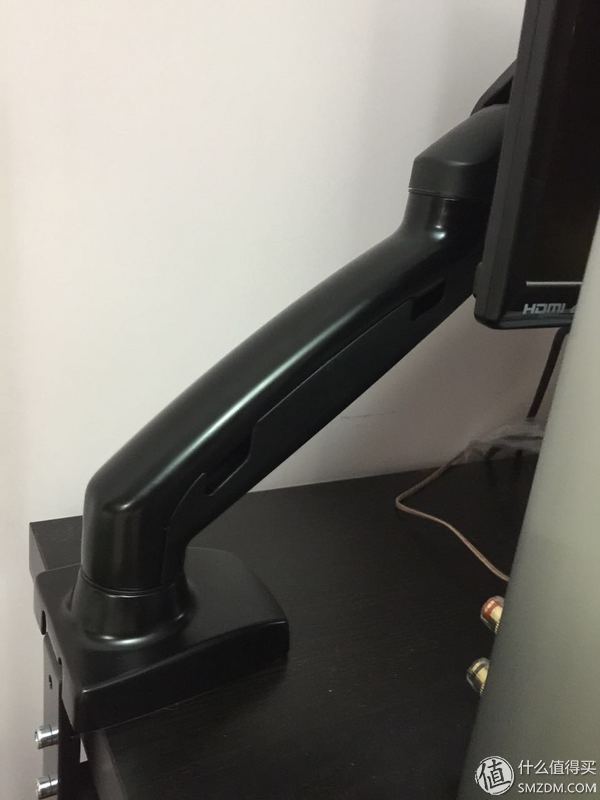
To make room for the speakers, change the mounting position to the back of the table. This is basically compatible with speakers.
However, it is still too naive.
The second section has the same length as the first section, so if you want to maintain the screen in the center of the table, the screen will advance about 30cm, leaving only one keyboard width between the front edge of the desktop. In other words, the "live" use area in front of the original screen becomes a "dead" storage area behind the screen.
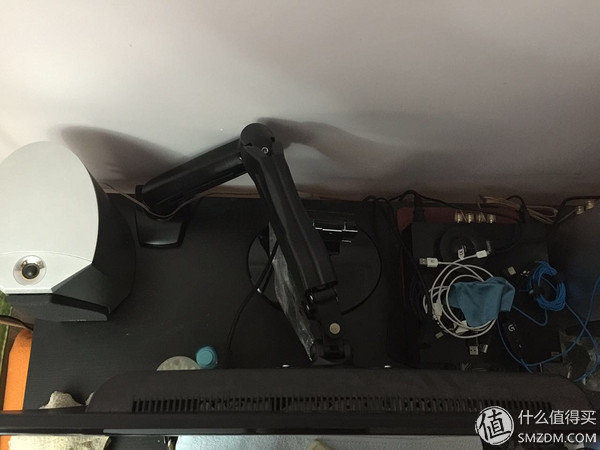
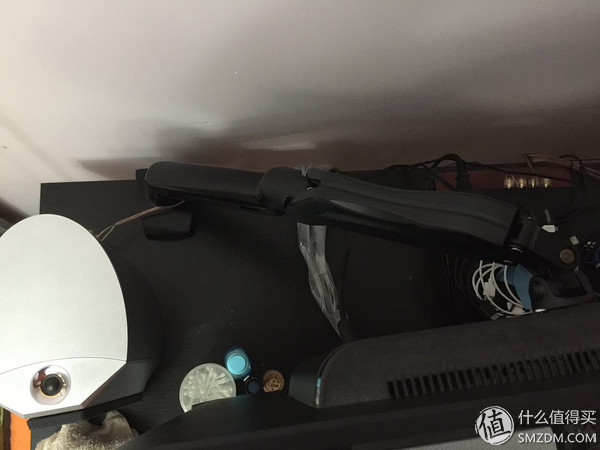
Of course, if you move the mounting position toward the centerline of the desktop, you can reduce the depth of the footprint by folding the cantilever sideways. However, after trying, I found that because of the large space occupied by the speakers and amplifiers on both sides, even if folded to a barely usable position, it would not be possible to drag around in everyday use. There is no essential difference with the use of the base. In the range of cantilever activity, basically no large items can be placed.
In the end, both programs failed to satisfy me. After thinking about 30 minutes, I decided to remove the rack to restore the desktop. This time the plan to liberate the desktop space has also failed.
in conclusionAs I conceived the title of this article, the word "devil's condition" jumped out almost instantaneously. (Not the conditions of the witch, all want to go to the wall...) Since the preliminary argument is not comprehensive, only the benefits of releasing the screen base space are taken into account, and the space occupied by the cantilever and the difficulty of adjustment are not taken into account. Like the protagonists of many tragedy stories, they only see the benefits of dealing with the devil, and forget that the price may be even higher.
The table is against the wall and its depth is limited. I believe many people's computer desks are the same as me. In this failure case, the main problem of the F80 is reflected in the fact that the angle between the cantilever and the base can not be adjusted in the first quarter (broad look, most of the similar products are like this) leads to a lot of desktop space and limited freedom of adjustment; As well as the long cantilever length in the second quarter, the utilization rate of desktop depth dropped significantly.
It can be seen that an important condition for the smooth use of such cantilevered supports is the amount of redundant space on the desktop. If you have a 21 meter desk, maybe this type of stand is for you. Or if you have 30cm of space behind your desk to allow the cantilever to fold back, then consider this type of product.
If not, I suggest to continue using the original base.
If it is necessary to put on a stand, I think maybe the style of the post short cantilever will be more hopeful.
Shenzhen Xcool Vapor Technology Co.,Ltd , http://www.xcoolvapor.com